Create a project
To create a new project on Upsun, you can take one of two paths:
Using the Console (recommended)
Open the Upsun management console to create your project.
Note
If you haven’t done so already, you are prompted to create your first organization where your project will reside.
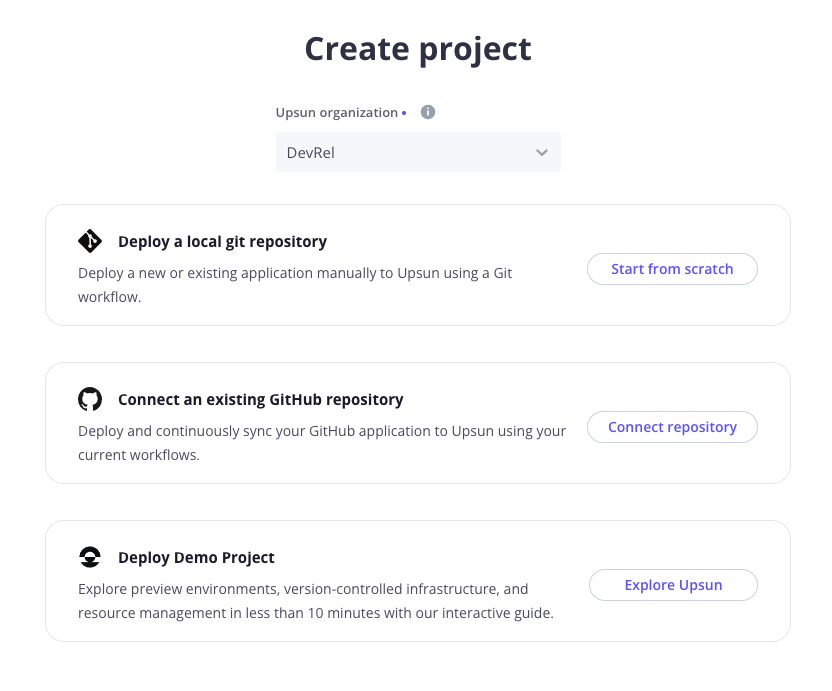
From the Console, what you do next entirely depends on where the “source of truth” of your codebase is located. In this guide, you will push your local repository to Upsun. That is, the only copy of your codebase you’d like to deploy is on your local computer.
Click Start from scratch from the Deploy with Git option.
Git integrations
This guide does not specifically address integrating an Upsun project with a third party repository such as one on GitHub, even though the Connect repository option is available at this stage.
For now, continue to work locally. Third party integrations will be addressed at the end of this guide.
Add details about your project, such as:
- The name of your project.
- The default branch of your local repository.
- Select the region where you want your project to be hosted.
As suggested in the Console, connect the local copy of your repository to your project:
upsun project:set-remote PROJECT_IDYour local source code is automatically linked to your newly created Upsun project through the creation of a .upsun/local/project.yaml file. This file contains the corresponding <projectId> and sets a Git remote to upsun.
Using the CLI
To create a new project with the Upsun CLI, use the following command and follow the prompts:
upsun project:createDefault branches
When creating a new project using the Upsun CLI command project:create, the default production branch is set to main. Change it if your default branch is different (e.g.: master).
Then, you are asked if you want to set the local remote to your new project. Enter Yes (y).
Your local source code is automatically linked to your newly created Upsun project through the creation of a .upsun/local/project.yaml file. This file contains the corresponding <projectId> and sets a Git remote to upsun.
In this guide, you will push your local repository to Upsun. That is, the only copy of your codebase you’d like to deploy is on your local computer.
Git integrations
This guide does not specifically address integrating an Upsun project with a third party repository such as one on GitHub, even though you will notice the Connect repository option available at this stage.
For now, continue to work locally. Third party integrations will be addressed at the end of this guide.
So long as you chose y (yes) to the question Set the new project <projectName> as the remote for this repository? during the project:create command, your local project is already integrated to the Upsun project.